Hacking my filter coffee machine
Nov. 26th, 2023 02:20 pmI hacked my coffee machine to let me turn it on from upstairs in bed :-). Read on for explanation, circuit diagrams, 3D models, firmware source code, and pictures.
- Background: the Morphy Richards filter coffee machine
- Planning
- Inside the Morphy Richards filter coffee machine
- Unexpected electrical hazard
- Design approach
- Implementation - hardware
- Implementation - software
- Results
- Epilogue
- Bonus pictures
Background: the Morphy Richards filter coffee machine
I have a Morphy Richards filter coffee machine. It makes very good coffee. But the display and firmware are quite annoying:
After it has finished making the coffee, it will keep the coffee warm using its hotplate, but only for 25 minutes. If you want to make a batch and drink it over the course of the morning that’s far too short.
It has a timer function. But it only has a 12 hour clock! You can’t retire upstairs on a Friday night, having programmed the coffee machine to make you coffee at a suitable post-lie-in time. If you try, you are greeted with apparently-inexplicably-cold coffee.
The buttons and UI are very confusing. For example, if it’s just sitting there keeping the coffee warm, and you pour the last, you want to turn it off. So you press the power button. Then the display lights up as if you’ve just turned it on! (The power LED is in the power button, which your finger is on.) If you know this you can get used to it, but it can confuse guests.
Also, I’m lazy and wanted to be able to cause coffee to exist from upstairs in bed, without having to make a special trip down just to turn the machine on.
Planning
My original feeling was “I can’t be bothered dealing with the coffee machine innards” so I thought I would make a mechanical contraption to physically press the coffee machine’s “on” button.
I could have my contraption press the button to turn the machine on (timed, or triggered remotely), and then periodically in pairs to reset the 25-minute keep-warm timer.
But a friend pointed me at a blog post by Andy Bradford, where Andy recounts modifying his coffee machine, adding an ESP8266 and connecting it to his MQTT-based Home Assistant setup.
I looked at the pictures and they looked very similar to my machine. I decided to take a look inside.
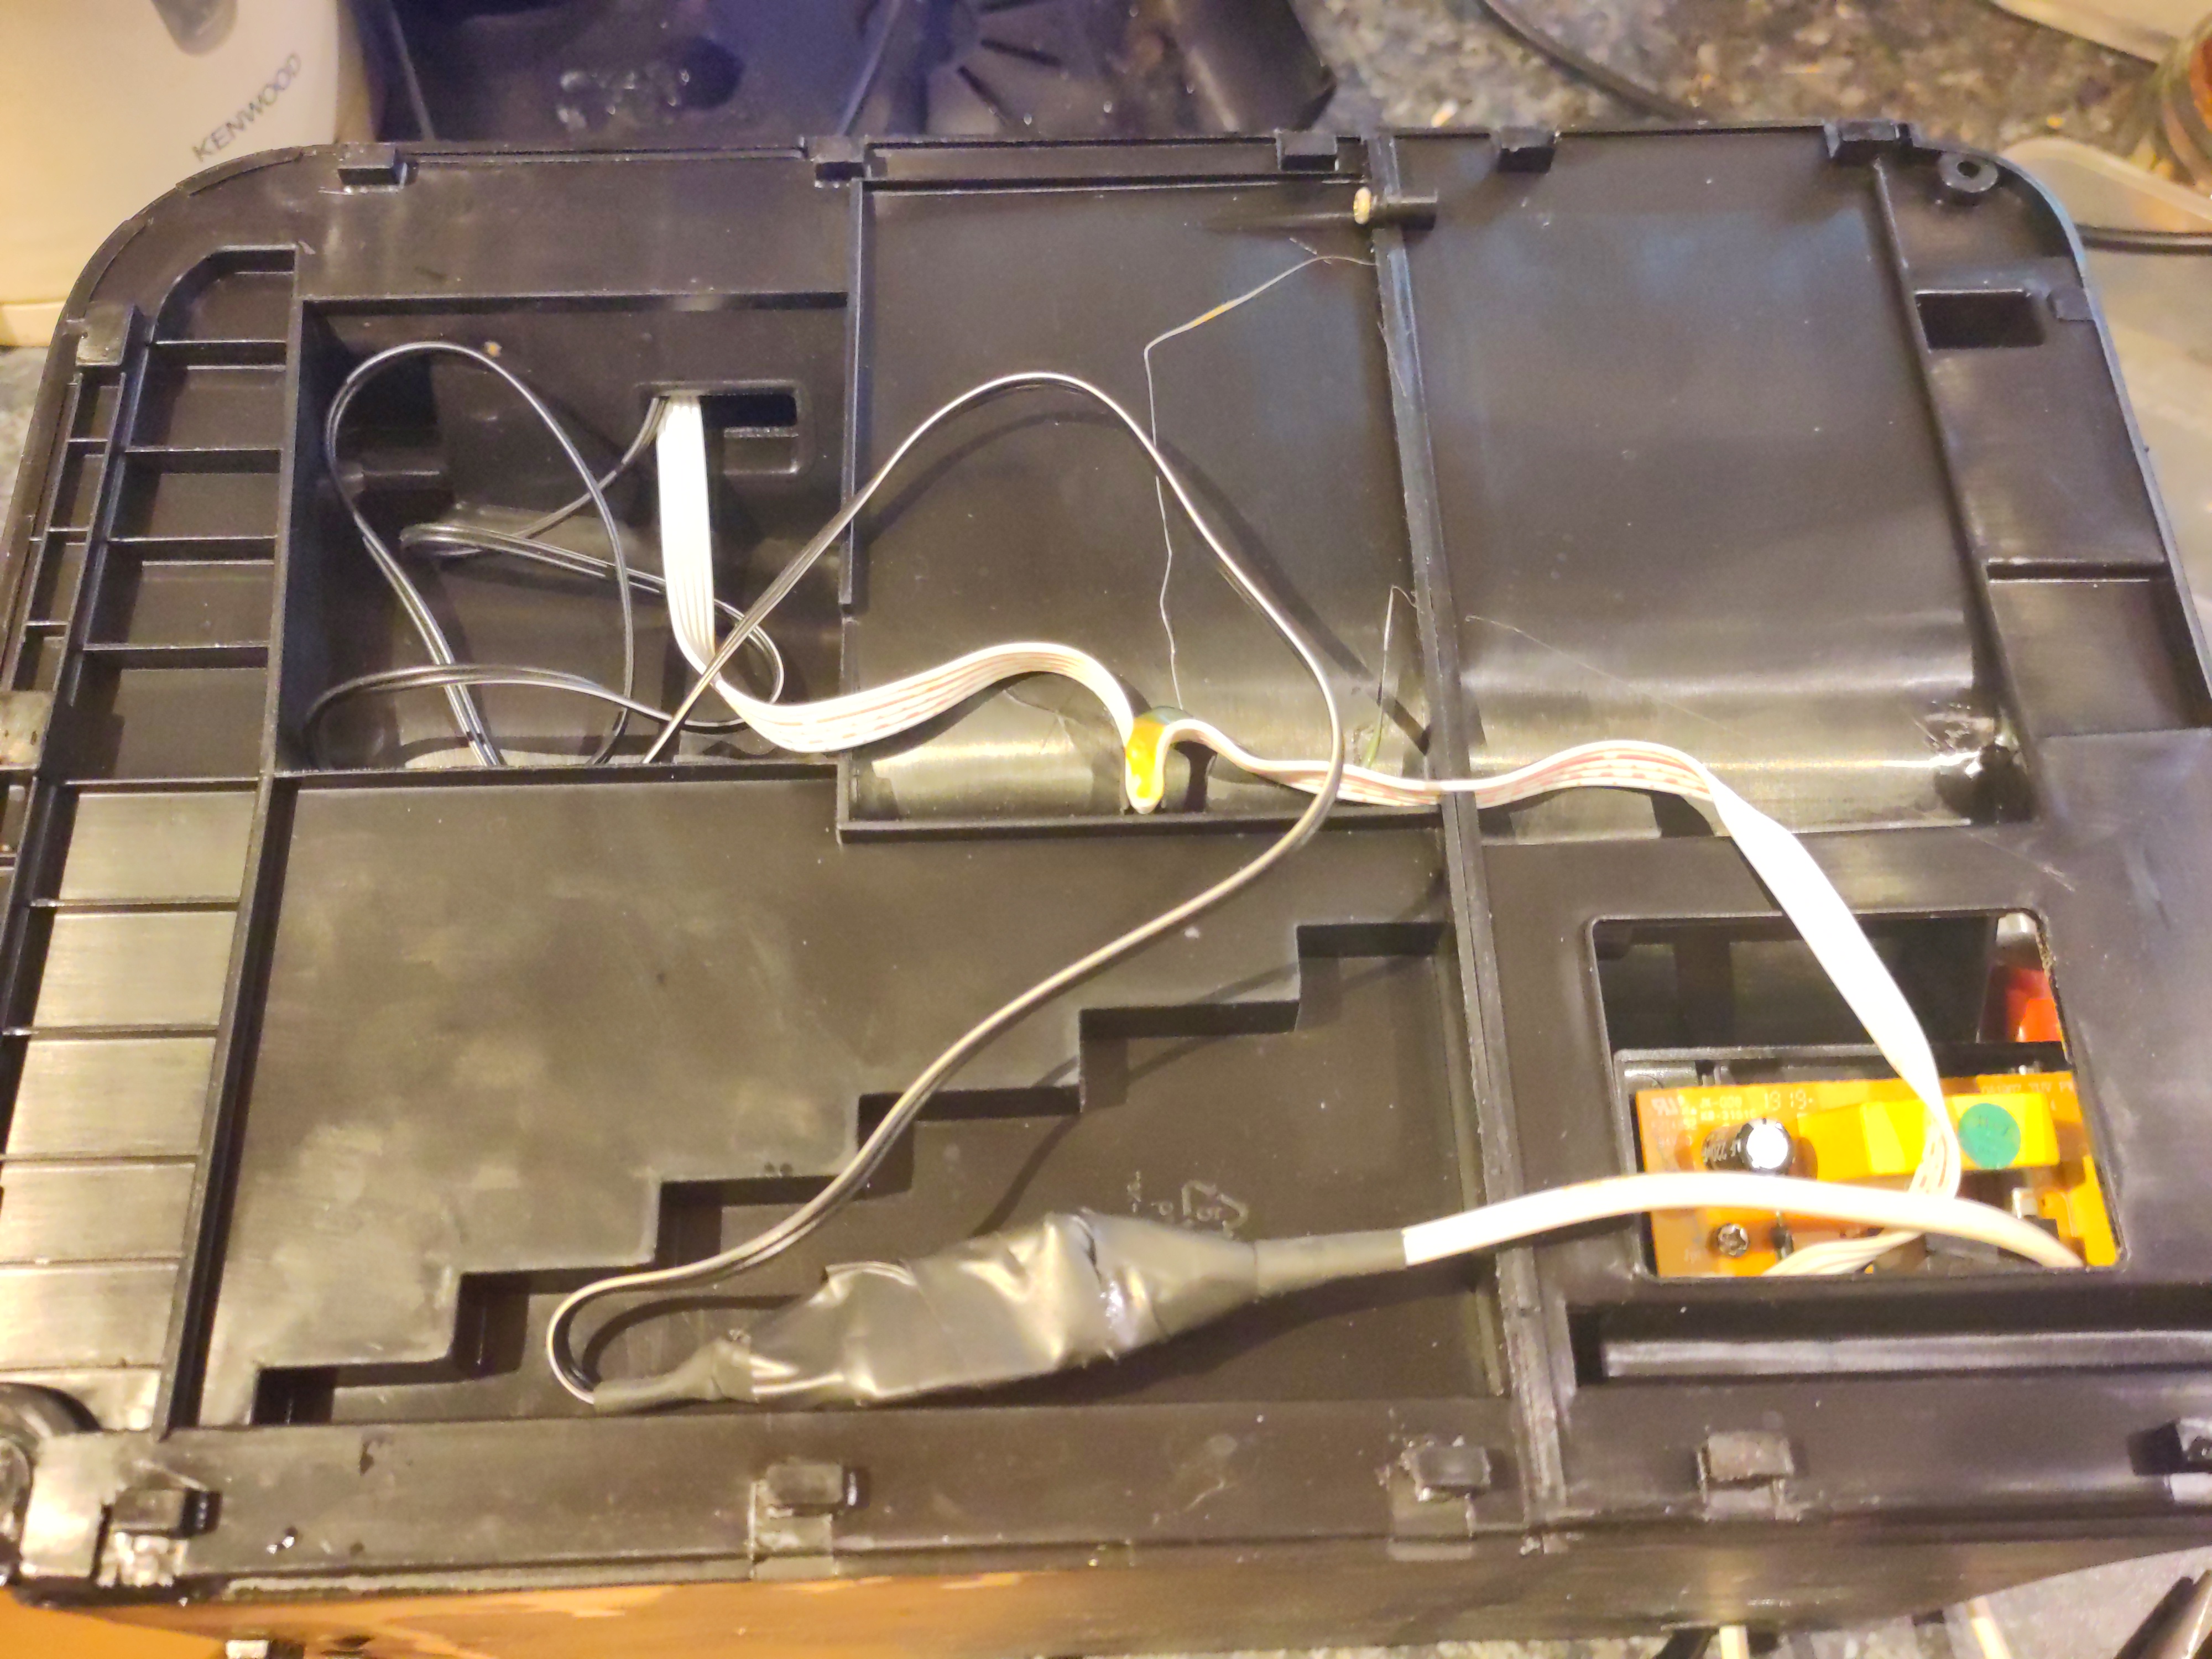
Inside the Morphy Richards filter coffee machine
My coffee machine seemed to be very similar to Andy’s. His disassembly report was very helpful. Inside I found the high-voltage parts with the heating elements, and the front panel with the display and buttons.
I spent a while poking about, masuring things, and so on.
Unexpected electrical hazard
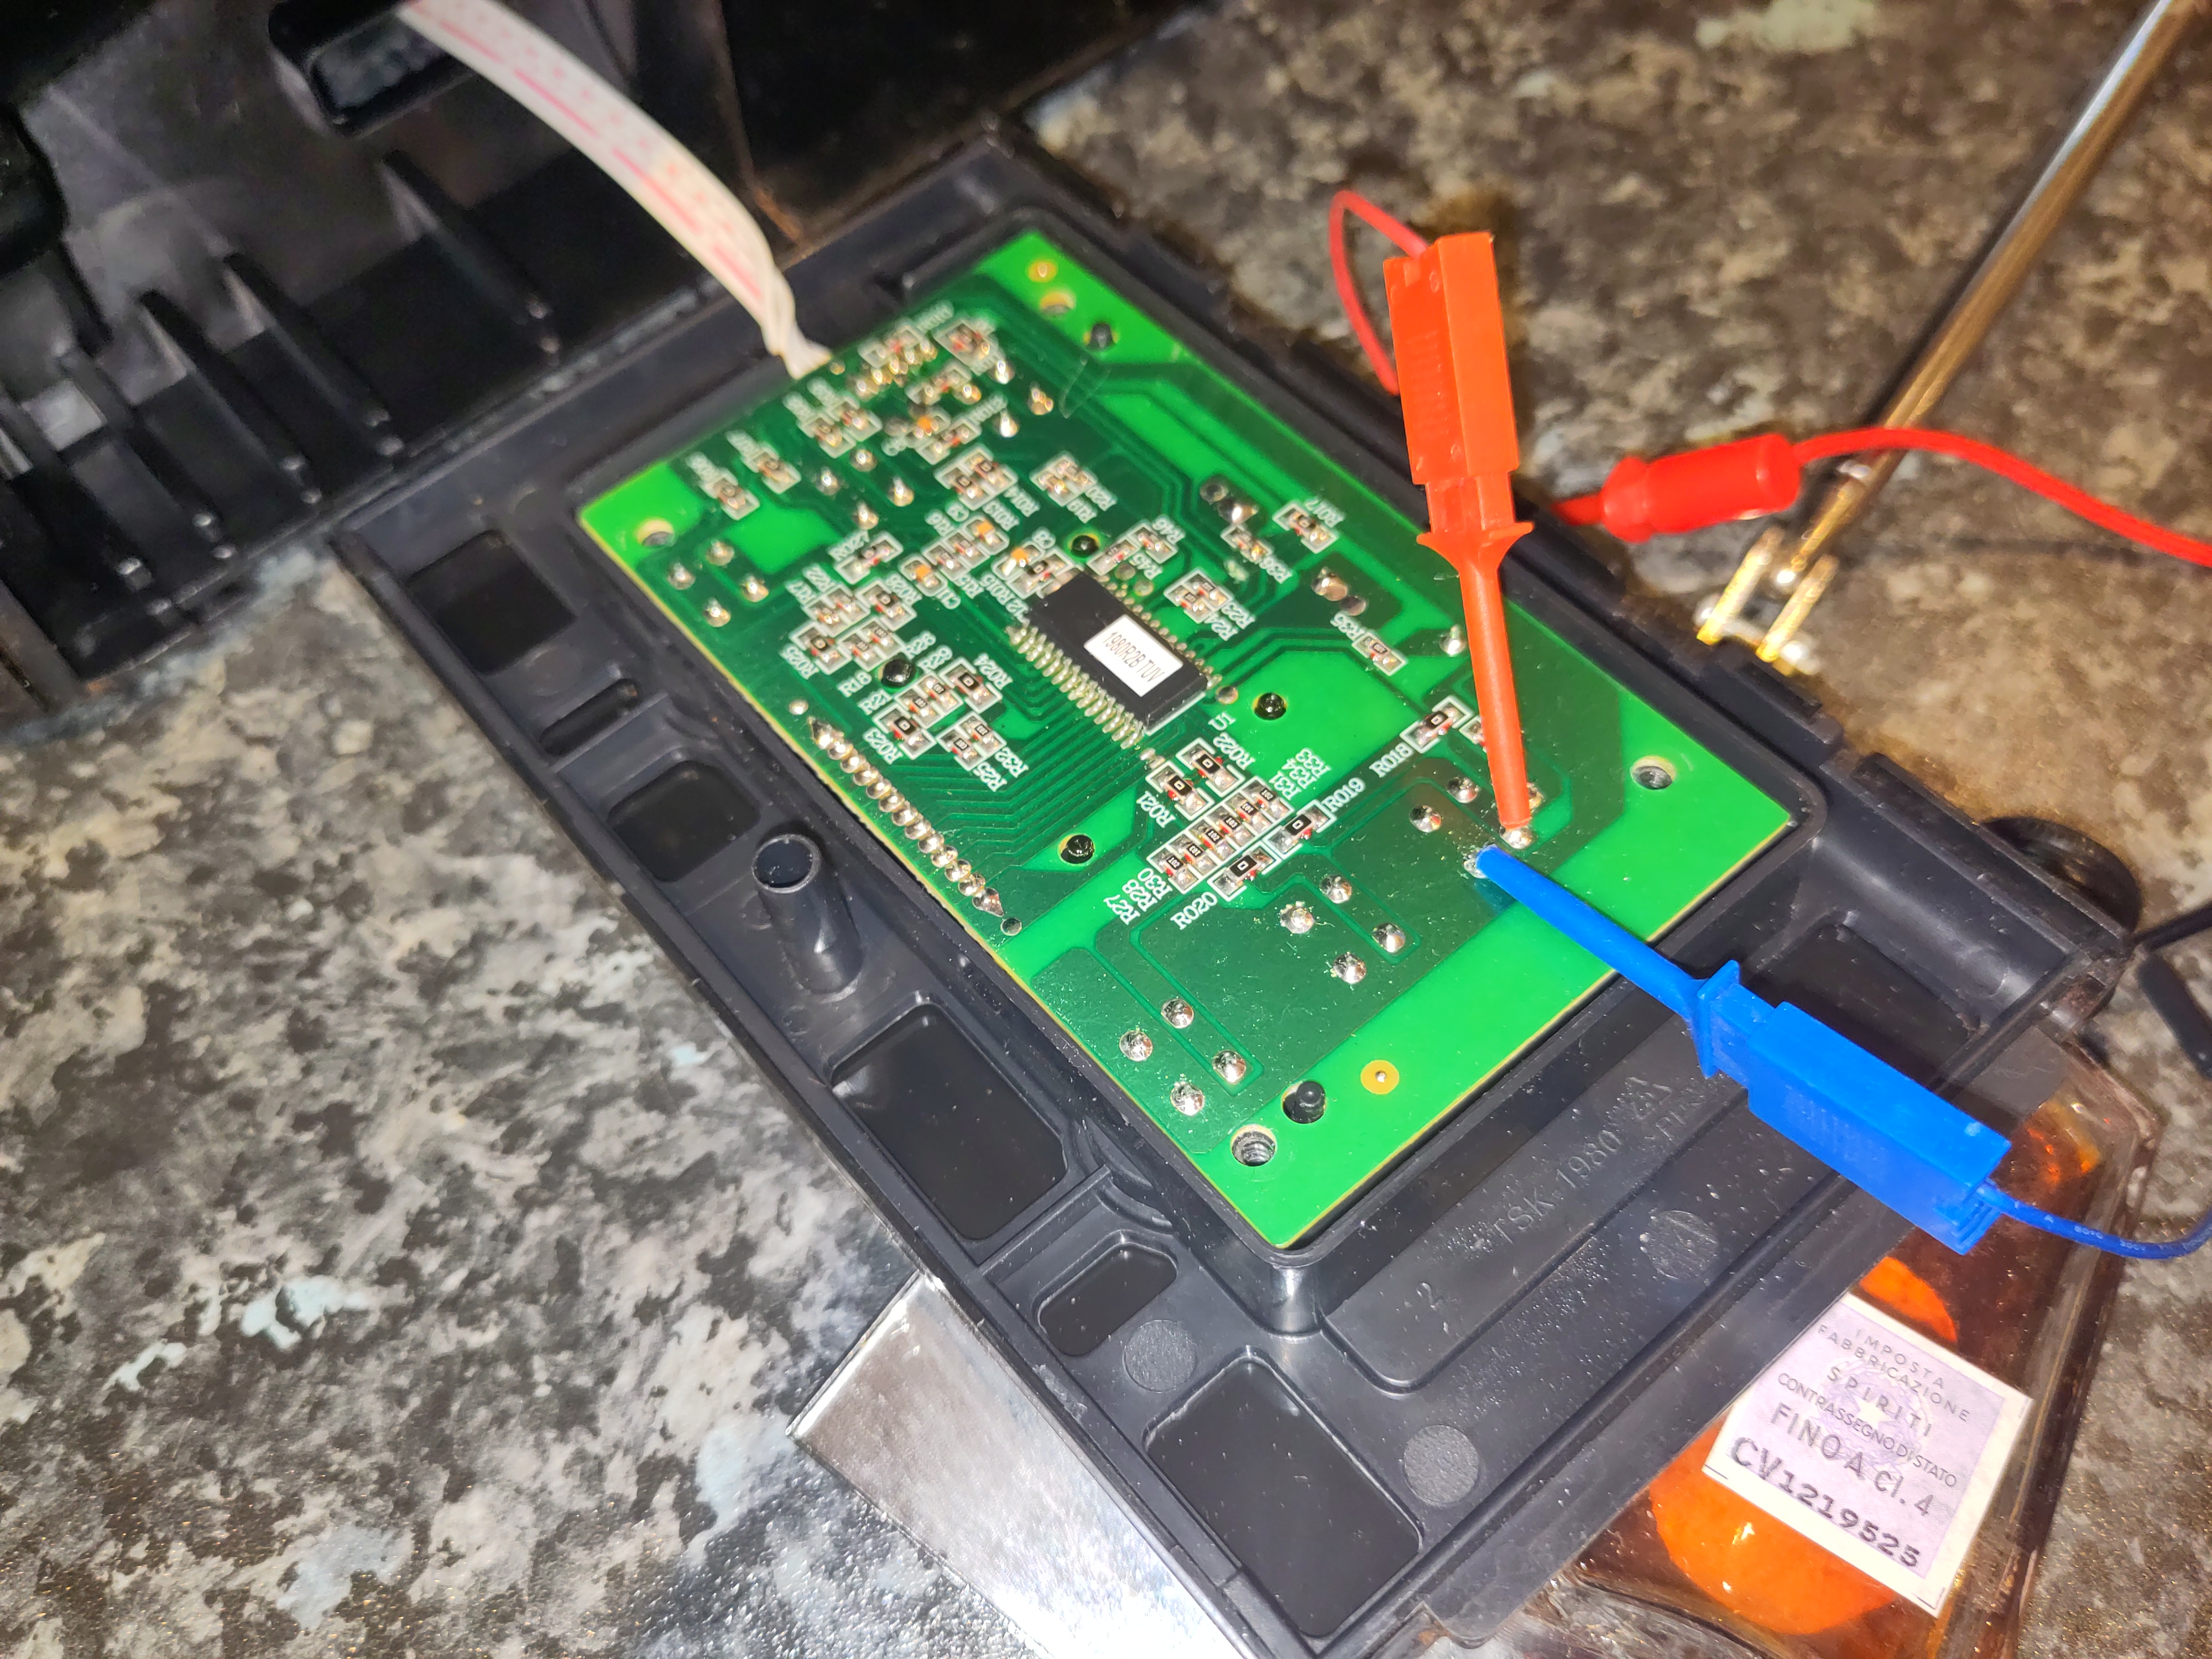
At one point I wanted to use my storage oscilloscope to capture the duration and amplitude of the “beep” signal. I needed to connect the ’scope ground to the UI board’s ground plane, but then when I switched the coffee machine on at the wall socket, it tripped the house’s RCD.
It turns out that the “low voltage” UI board is coupled to the mains. In my setting, there’s an offset of about 8V between the UI board ground plane, and true earth. (In my house the neutral is about 2-3V away from true earth.)
This alarmed me rather. To me, this means that my modifications needed to still properly electrically isolate everything connected to the UI board from anything external to the coffee machine’s housing.
In Andy’s design, I think the internal UI board ground plane is directly brought out to an external USB-A connector. This means that if there were a neutral fault, the USB-A connector would be at live potential, possibly creating an electrocution or fire hazard. I made a comment in Andy Bradford’s blog, reporting this issue, but it doesn’t seem to have appeared. This is all quite alarming. I hope Andy is OK!
Design approach
I don’t have an MQTT setup at home, or an installation of Home Assistant. I didn’t feel like adding a lot of complicated software to my life, if I could avoid it. Nor did I feel like writing a web UI myself. I’ve done that before, but I’m lazy and in this case my requirements were quite modest.
Also, the need for electrical isolation would further complicate any attempt to do something sophisticated (that could, for example, sense the state of the coffee machine).
I already had a Tasmota-based cloud-free smart plug, which controls the fairy lights on our gazebo. We just operate that through its web UI. So, I decided I would add a small and stupid microcontroller. The microcontroller would be powered via a smart plug and an off-the-shelf USB power supply.
The microcontroller would have no inputs. It would simply simulate an “on” button press once at startup, and thereafter two presses every 24 minutes. After the 4th double press the microcontroller would stop, leaving the coffee machine to time out itself, after a total period of about 2h.
Implementation - hardware
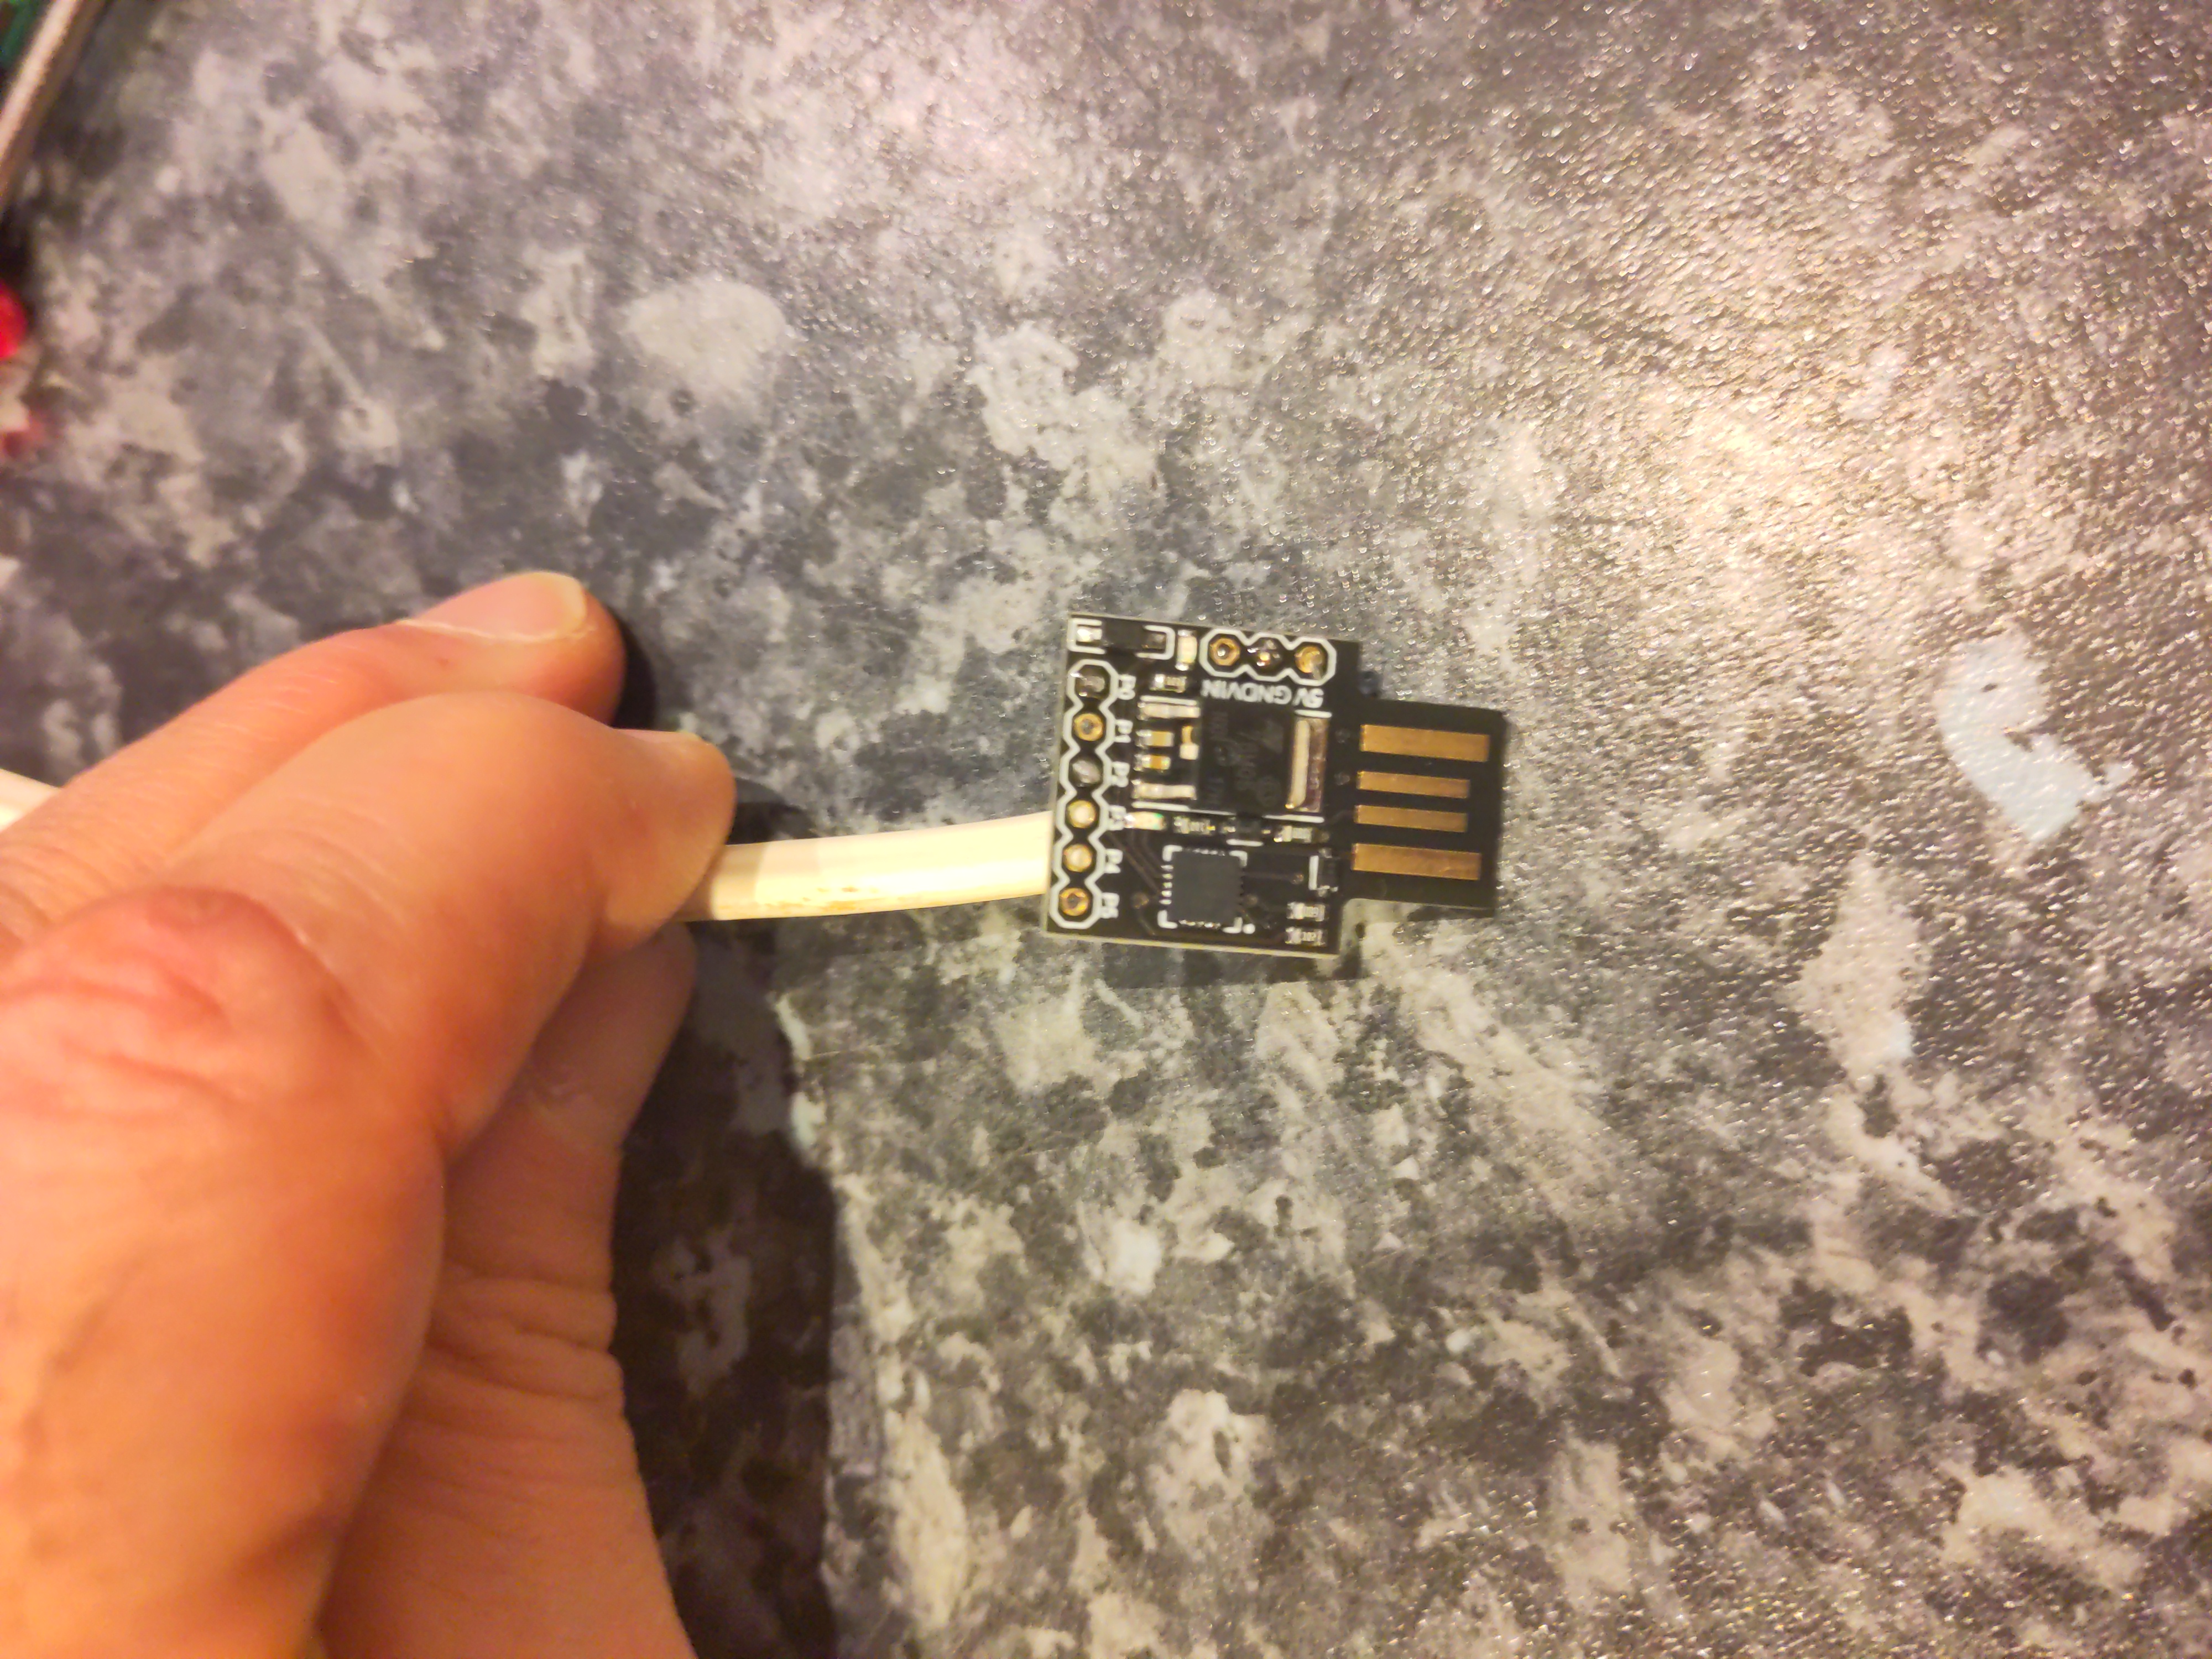
I used a DigiSpark board with an ATTiny85. One of the GPIOs is connected to an optoisolator, whose output transistor is wired across the UI board’s “on” button.
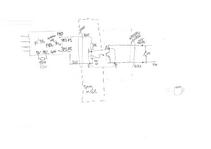
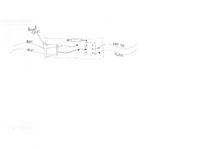 (click for diagram scans as pdfs).
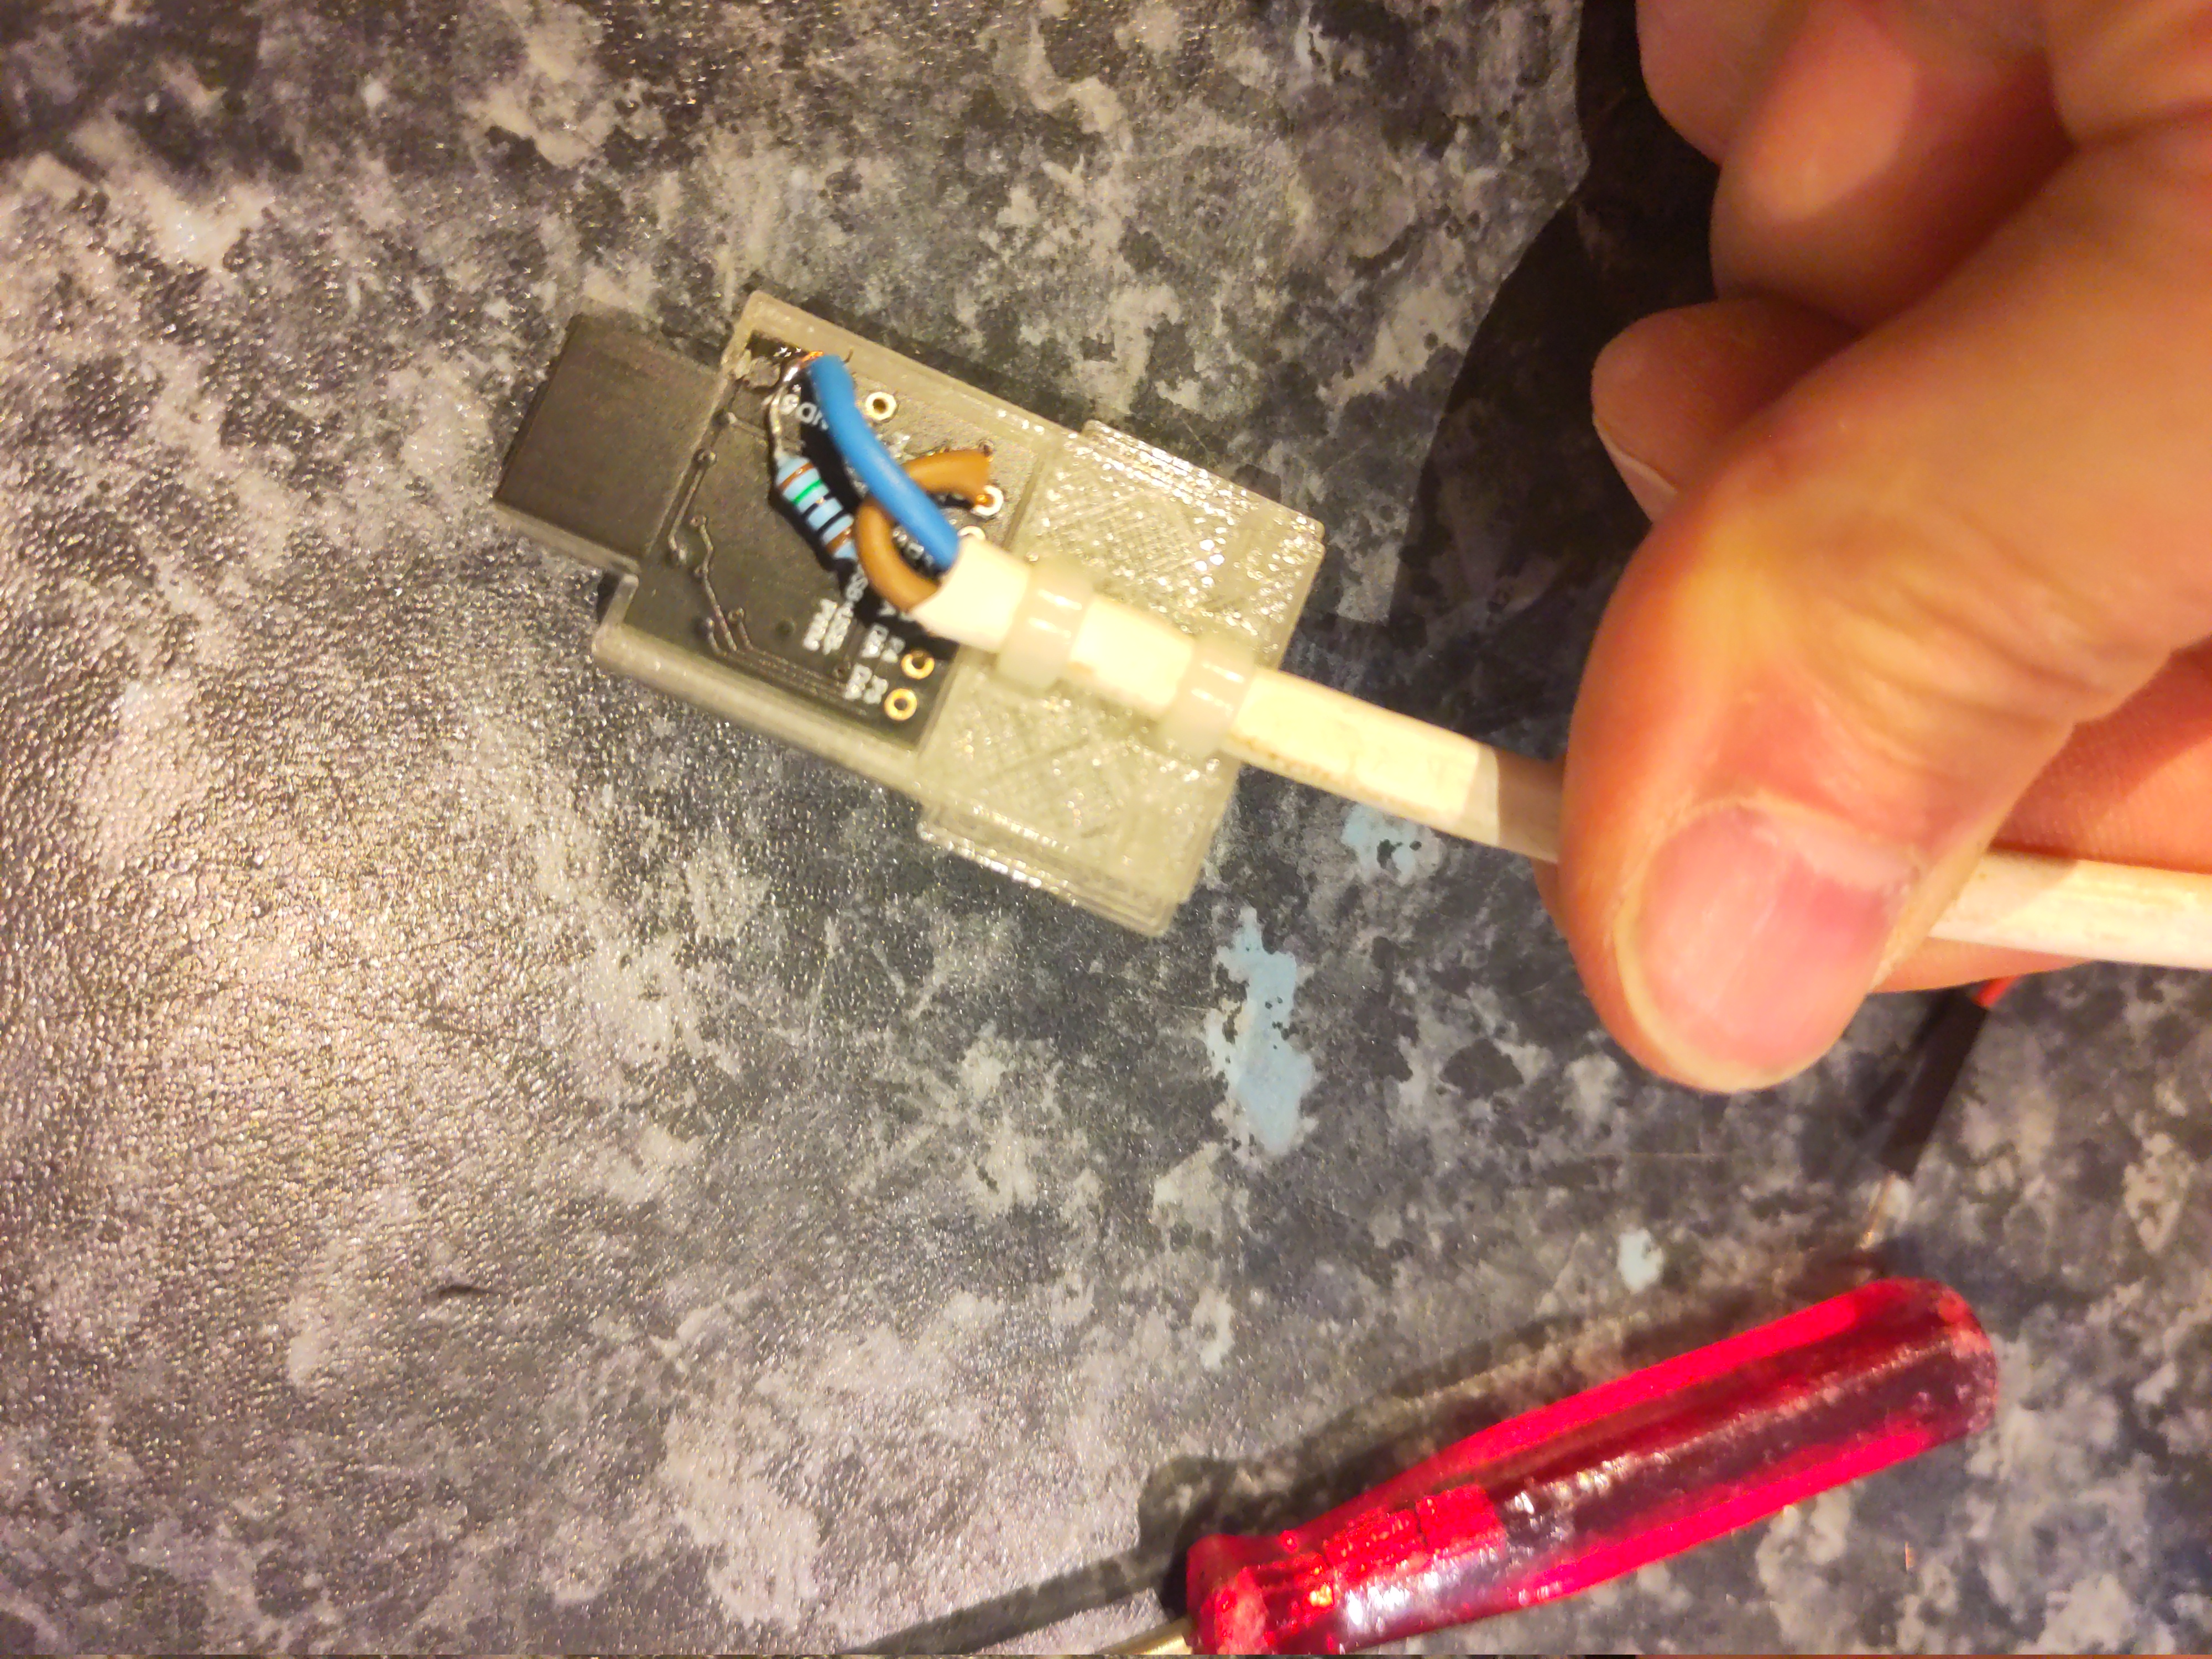
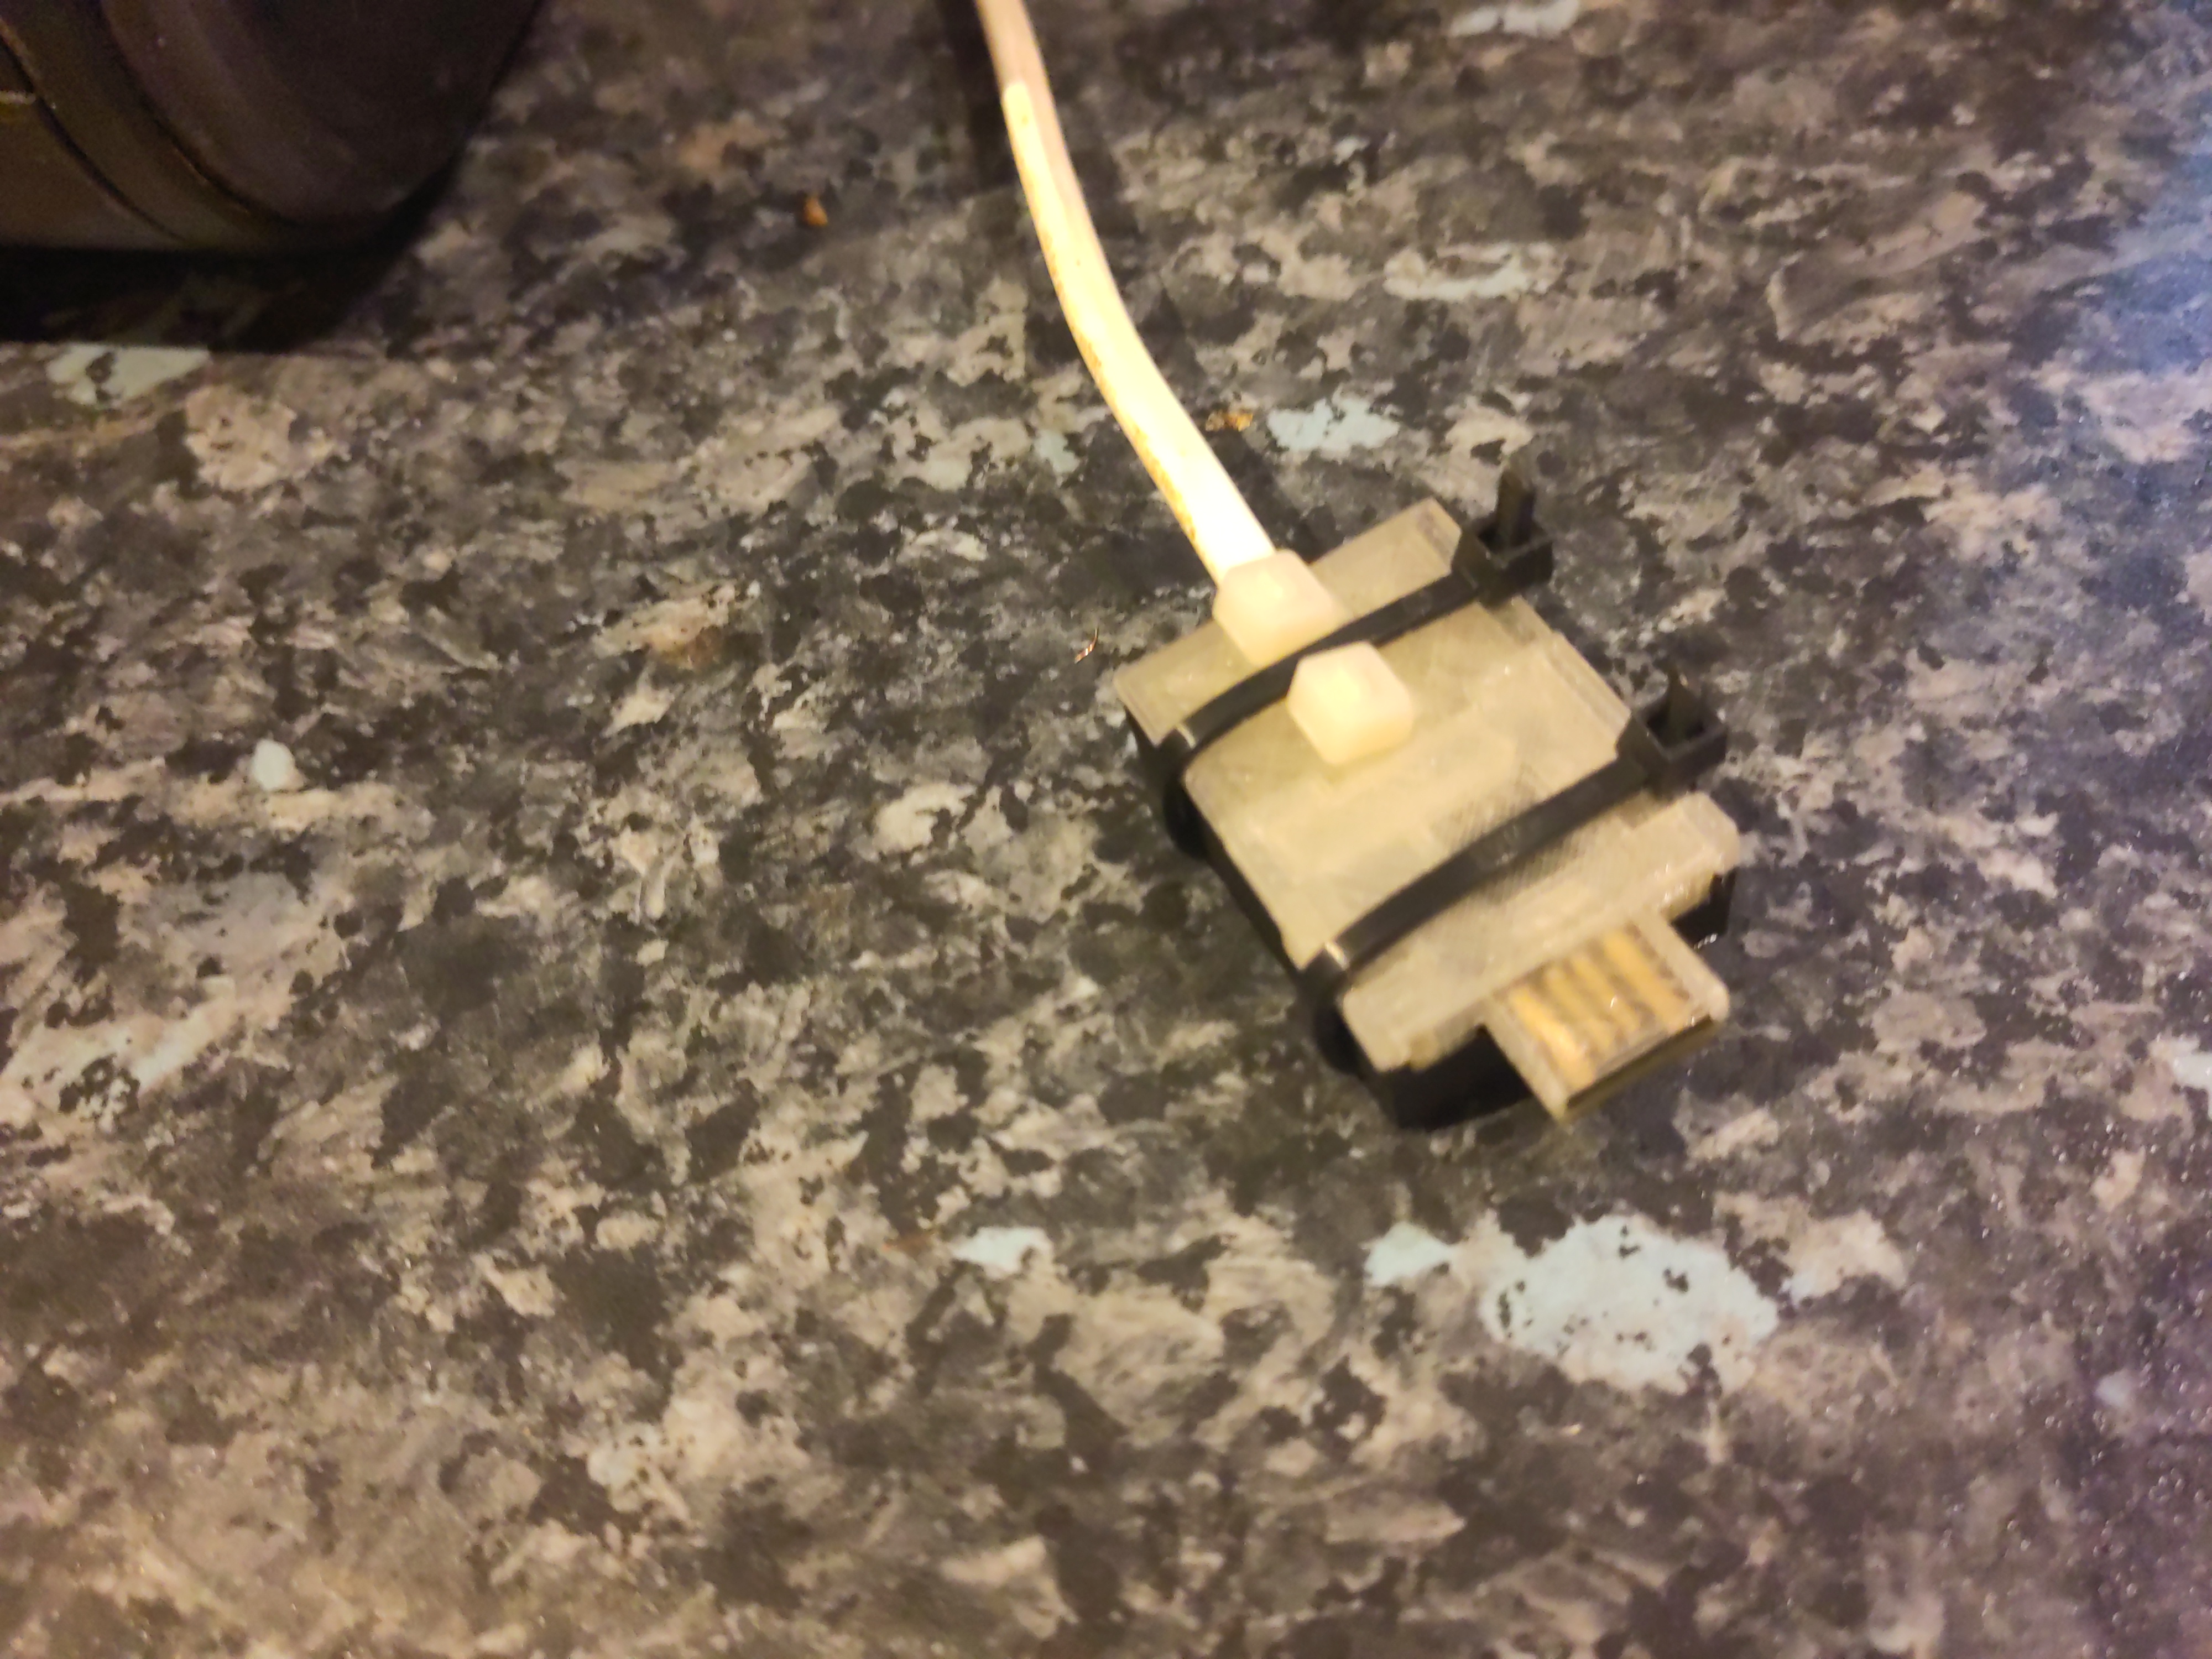
The DigiSpark has just a USB tongue, which is very wobbly in a normal USB socket. I designed a 3D printed case which also had an approximation of the rest of the USB A plug. The plug is out of spec; our printer won’t go fine enough - and anyway, the shield is supposed to be metal, not fragile plastic. But it fit in the USB PSU I was using, satisfactorily if a bit stiffly, and also into the connector for programming via my laptop.
Inside the coffee machine, there’s the boundary between the original, coupled to mains, UI board, and the isolated low voltage of the microcontroller. I used a reasonably substantial cable to bring out the low voltage connection, past all the other hazardous innards, to make sure it stays isolated.
I added a “drain power supply” resistor on another of the GPIOs. This is enabled, with a draw of about 30mA, when the microcontroller is soon going to “off”/“on” cycle the coffee machine. That reduces the risk that the user will turn off the smart plug, and turn off the machine, but that the microcontroller turns the coffee machine back on again using the remaining power from USB PSU. Empirically in my setup it reduces the time from “smart plug off” to “microcontroller stops” from about 2-3s to more like 1s.
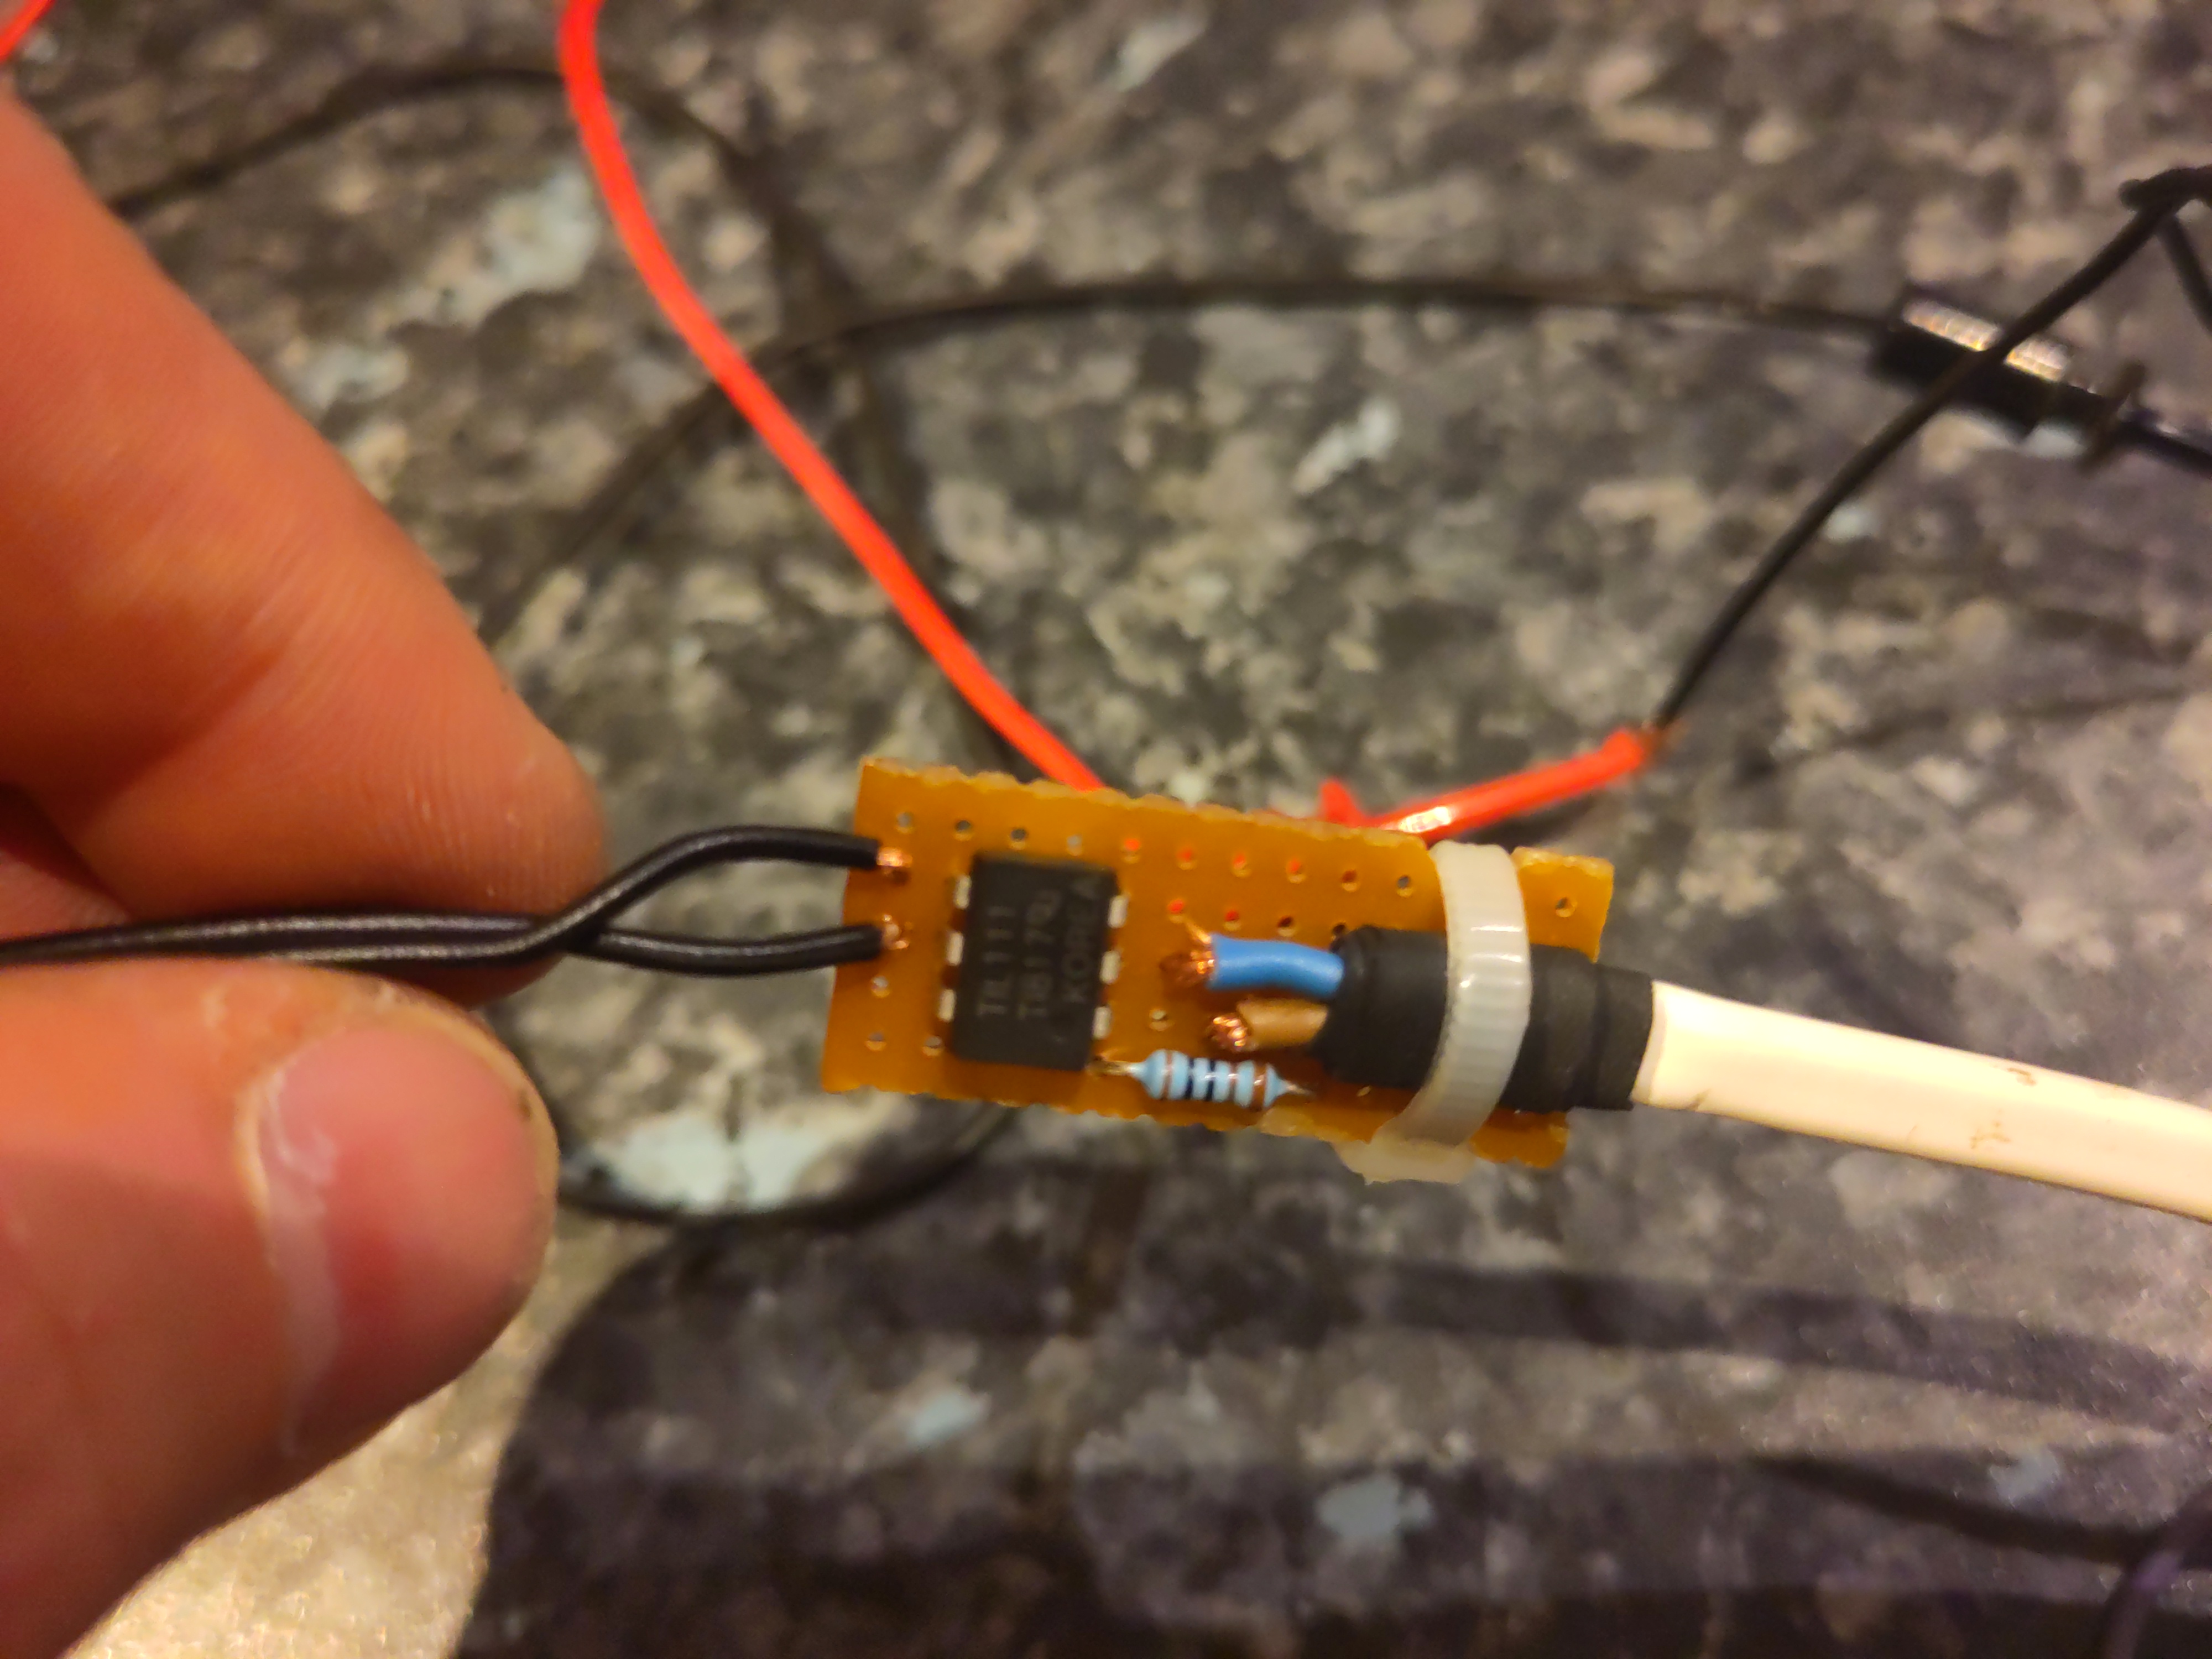
Optoisolator board (inside coffee machine) pictures
(Click through for full size images.)
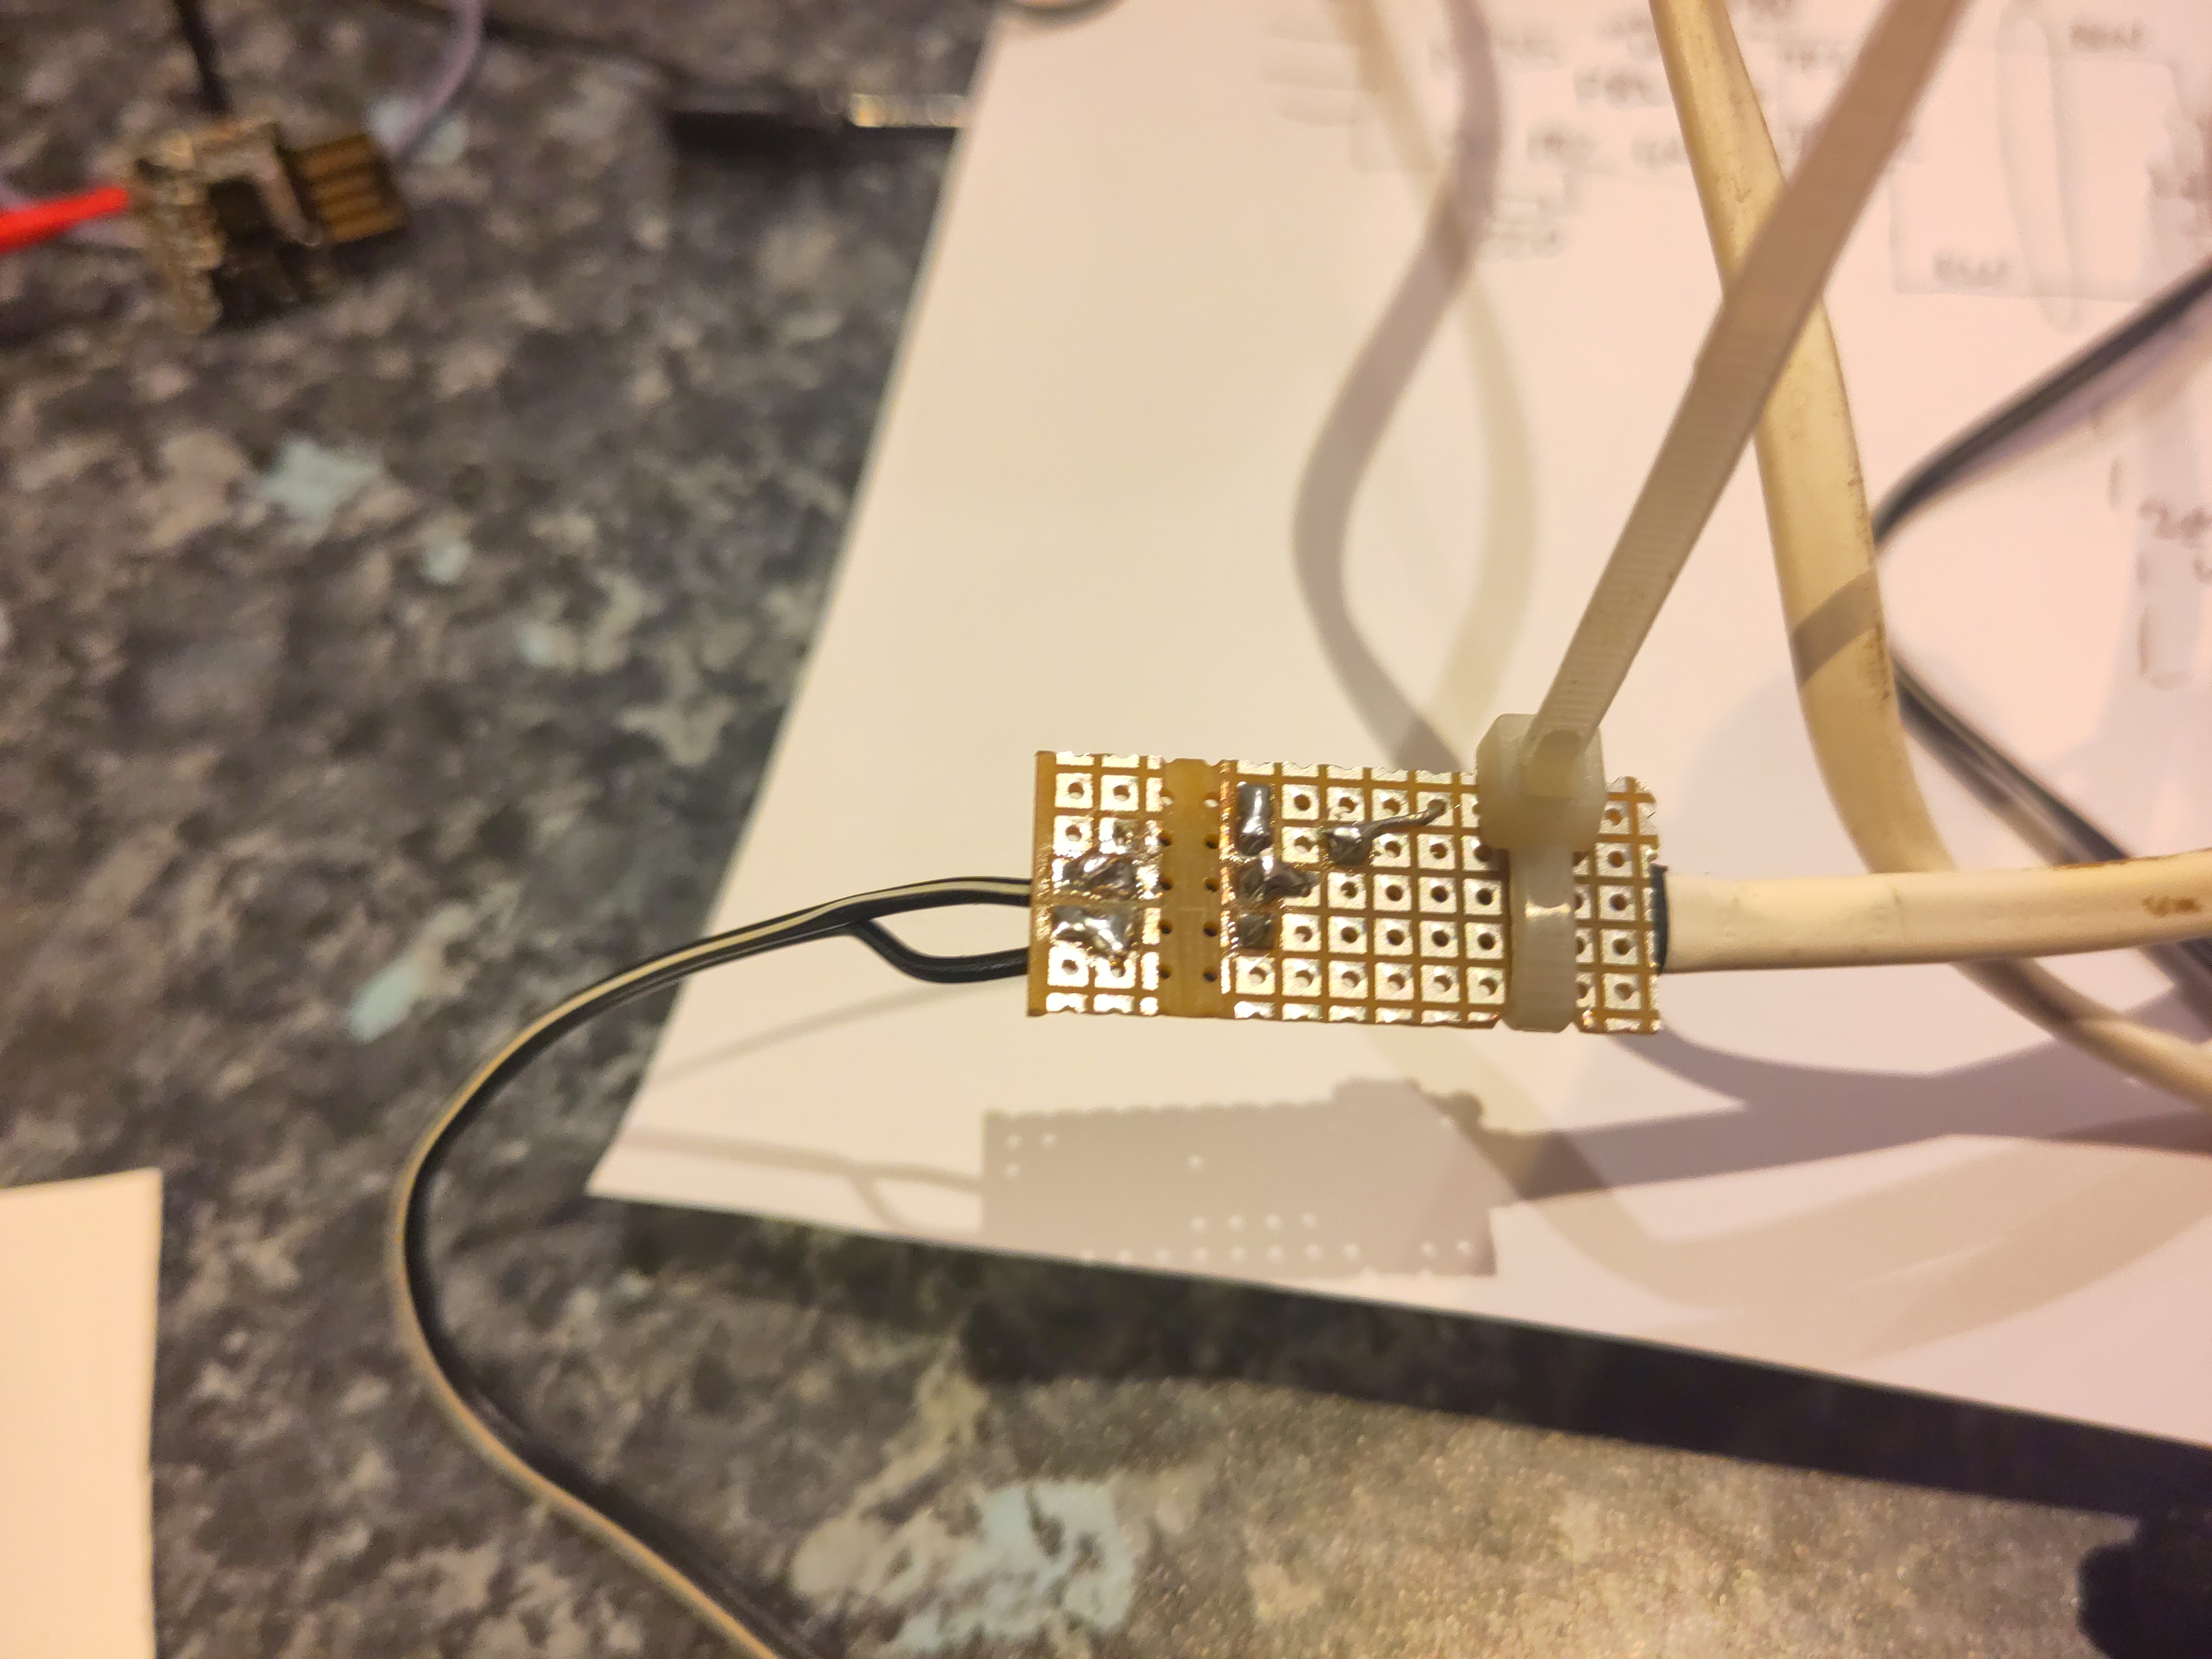
Microcontroller board (in USB-plug-ish housing) pictures
Implementation - software
I originally used the Arduino IDE, writing my program in C. I had a bad time with that and rewrote it in Rust.
The firmware is in a repository on Debian’s gitlab
Results
I can now cause the coffee to start, from my phone. It can be programmed more than 12h in advance. And it stays warm until we’ve drunk it.
UI is worse
There’s one aspect of the original Morphy Richards machine that I haven’t improved: the user interface is still poor. Indeed, it’s now even worse:
To turn the machine on, you probably want to turn on the smart plug instead. Unhappily, the power button for that is invisible in its installed location.
In particular, in the usual case, if you want to turn it off, you should ideally turn off both the smart plug (which can be done with the button on it) and the coffee machine itself. If you forget to turn off the smart plug, the machine can end up being turned on, very briefly, a handful of times, over the next hour or two.
Epilogue
We had used the new features a handful of times when one morning the coffee machine just wouldn’t make coffee. The UI showed it turning on, but it wouldn’t get hot, so no coffee. I thought “oh no, I’ve broken it!”
But, on investigation, I found that the machine’s heating element was open circuit (ie, completely broken). I didn’t mess with that part. So, hooray! Not my fault. Probably, just being inverted a number of times and generally lightly jostled, had precipitated a latent fault. The machine was a number of years old.
Happily I found a replacement, identical, machine, online. I’ve transplanted my modification and now it all works well.
Bonus pictures
(Click through for full size images.)

(no subject)
Date: 2023-11-26 05:23 pm (UTC)Hacking the coffee maker is only #2
Date: 2023-11-27 05:14 pm (UTC)You just made hacking your brain easier - it's a win win.